When I was a kid my family took a theme park vacation to California. I still have fond memories of our time there. So, I was excited when I had the opportunity to go to Universal Studios Florida with my boys, dad, sister, and niece. Dad was the one who introduced us to Harry Potter movies when we were kids and they first came out. It was a fun, full circle moment, to include him in sharing the magic with our kids.
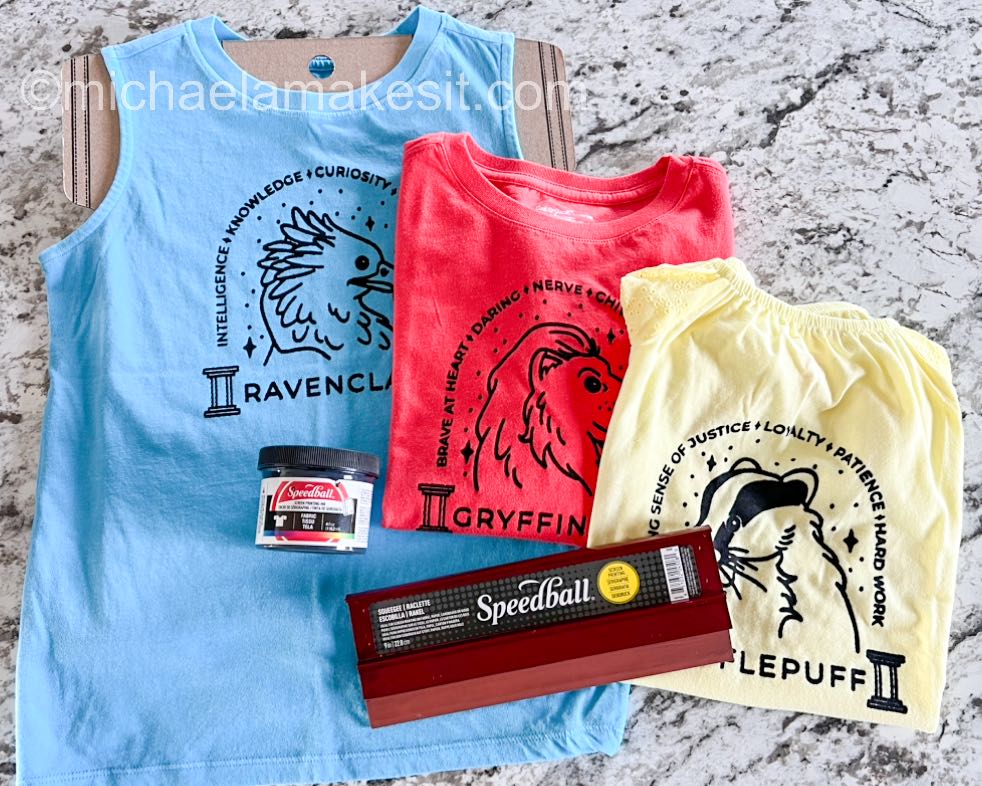
To help make the occasion extra special, we let our boys take the sorting hat quiz and I made them shirts for their corresponding houses. I also made a shirt for my niece, but since she hasn’t been sorted yet, made the logical decision to give her a Hufflepuff shirt (to match her favorite aunt, of course!).

When it comes to shirts, I prefer screen printed over heat transfer vinyl. I like the way it allows the shirt to flow and move freely. And since I don’t have a heat press, I don’t have to worry about vinyl peeling off if it’s not set correctly.
Materials and Tools needed.
Screen printing can sound intimidating, but it its actually quite simple. And when you use vinyl to cut your pattern, its easy to wash and reuse the same screen multiple times. What you will need:
- Screen printing screen and squeegee. (This is a great starter kit on Amazon, it even includes vinyl and transfer tape! Speedball beginner Screen Print Kit)
- Vinyl Cutting Machine and. (I highly recommend Silhouette brand. The Cameo 4 is an excellent machine. Or if you want the latest model, the Cameo 5 just came out.)
- Vinyl weeding tool. (I prefer reverse tweezers.)
- Shirts. (I got the kid’s shirts from Target, and a tanktop for my sister from Hobby Lobby.)
- Craft Vinyl and transfer tape.
- Screen print ink. (I used Speedball Black and Speedball Black Pearl.)
- Design/Image. (I generally get mine from Etsy)
- Cardboard or cardboard shirt form. (A scrap of cardboard the width of the shirt works great. I got my shirt form from Hobby Lobby.)
Setting Up
First, use your vinyl machine to cut out your design flipped BACKWARDS. Be sure to measure and adjust the size to fit how you want on the shirt. You’ll want to cut out the design backwards, because when we attach the vinyl to the bottom of the screen it will be the correct direction.
Then, weed out the design.

Next, attach the cut vinyl to the back (bottom) of the screen print screen. Make sure to flip the screen right side up and press the vinyl on firmly. (Optional – Use painters tape to tap off any area around the design that is not covered by vinyl. My designs were small enough in the vinyl sheet, I had plenty of room to move the ink without it getting on the shirt where I didn’t want it.)
Now it’s time to print!
Lay your shirt on a flat surface and place the cardboard inside. This will stop the ink from bleeding through to the back of the shirt. Then, lay the screen where you want the design.
Scoop your desired screen print ink color along the top of your design (I like to use a plastic spoon for this, and then just throw it away when I’m done with the project.)

Using your squeegee, pull the ink down across without pressure the screen so the entire design is covered. Start again at the top and pull the ink down again, this time applying pressure. Repeat if necessary until the entire design is filled in. *Tip- make sure each stroke goes fully from the top to bottom of the design. If you stop or start in the middle you may end up with lines in your design.
Carefully lift your screen to reveal your design. Set your shirt aside to dry completely.
To clean up, I use my plastic spoon to scoop any left over piles of ink from the screen and squeegee back into the jar. Then peel the vinyl off the back of the screen and throw away. Rince your screen off using warm water and let it dry completely before using again.


Finally, you’ll need to heat set your design. Once your shirt is completely dry (I like to wait overnight) lay a thin towel or scrap fabric over your design and iron. You’ll want to make sure each part of the design is heated for 10-15 seconds (or according to the ink directions.)
And Congratulations, you just screen printed your own shirt! Be proud of yourself, and enjoy your new creation!
Our kids were very excited to represent their Hogwarts houses. We certainly had a great time, and have lots of new memories to cherish.


(And no, I did not make the shirt that I wore. I found it on Amazon and decided to purchase it instead. I will say, I am very pleased with it! It’s very comfortable and the vinyl has held up very well. It has become one of my go to shirts to wear now. *unfortunately, it’s currently unavailable, if it comes back I’ll post the link.)